To make things easier we have created some MaxBoxy panels you can import inside your WordPress site to start easily. This enables you to quickly move MaxBoxy’s content from one site to another or to start easily with the following examples.
IMPORTANT: WordPress importer plugin has to be installed and active on your site.
Basic panel strain examples
1. Let’s import some basic examples demonstrating mostly panel types.
FloatAny panels – Download this xml file.
InjectAny panels – Download this xml file.
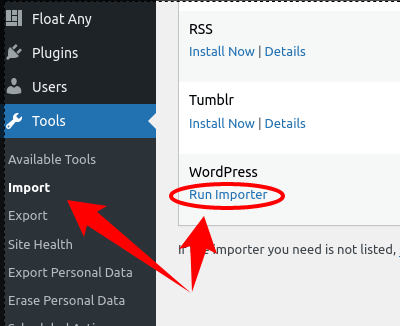
Import those files from your WordPress Dashboard -> Tools -> Import. On this step you have to select “WordPress” by clicking “Run Importer”.
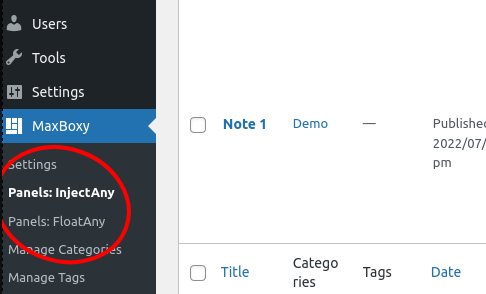
2. Once you finish the importing process, go to the Dashboard -> MaxBoxy -> Panels: FloatAny or Panels: InjectAny section. Notice, panels have been set as drafts. Edit the panel you wish to test and just change the status to “Publish”. It will be loading on your site, now.
From the content triggered FloatAny panels
- Save this xml file to your computer and import it in the same way as with the previous “panel types” example, i..e. from your WordPress Dashboard -> Tools -> Import.
- Now, get this txt file. It’s important to open it with a text editor, so it can be copied without impairments. Copy the whole content.
- Finally, create a test page on your site and paste the copied content. You should be able to trigger FloatAny panels from the content just like in our demo.
IMPORTANT: You need the Pro addon active to get these (from the content triggered) examples working.
You see, these are just examples so that you can immediately see how things work. You should modify those elements and build upon them from there. Let’s get started!