Global settings
On this page hopefully, we help you with all the answers you may have with the Booster Sweeper plugin when you’re managing and cleaning assets for your WordPress site.
Installation
Download the purchased plugin. Go to the “Plugins” section of your WordPress admin dashboard. Click on the “Add new” and chose the “Upload plugin” button. Click on “Browse” to select the plugin. Finish with the “Install Now” button.

Activate the plugin
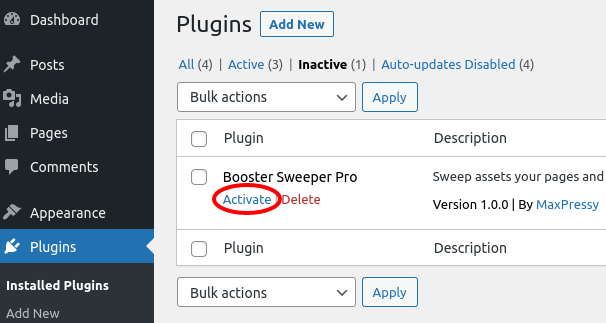
Now, visit the “Installed Plugins” section. Activate Booster Sweeper Pro.
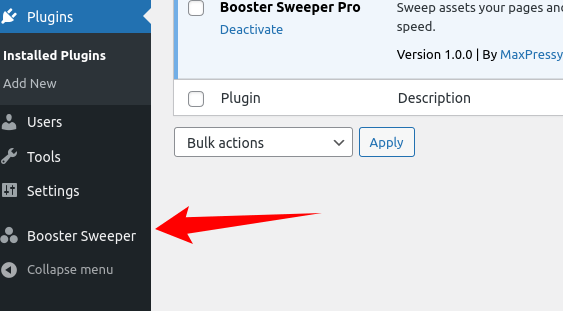
Once active you can reach out to the Settings menu from the admin’s left sidebar navigator.
Global settings
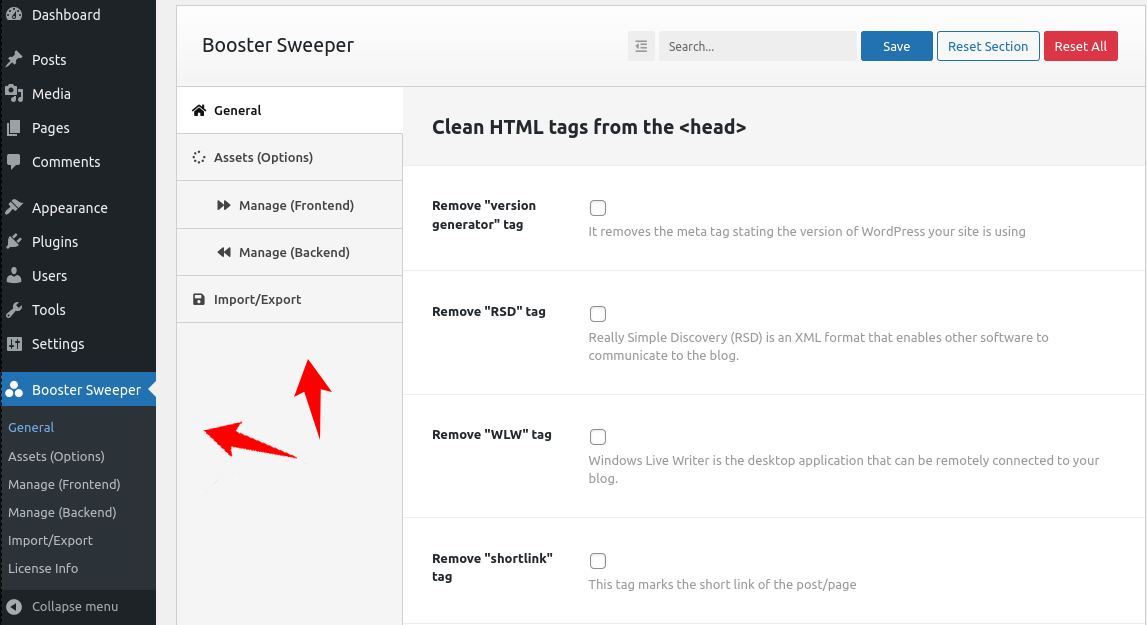
Navigate to the Booster Sweeper’s Settings page. Here you can determine the global site options. More about each section beneath.
Individual page settings
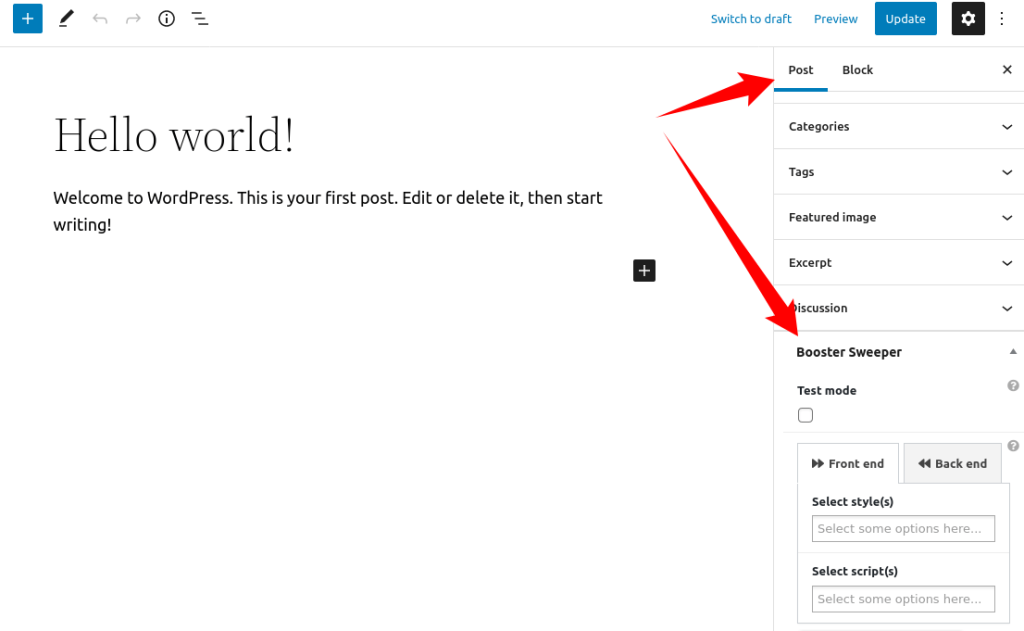
On each post/page you can manage assets for that post/page. Switching the tabs allows you to manage assets for the front side or back-end side of the page.
License
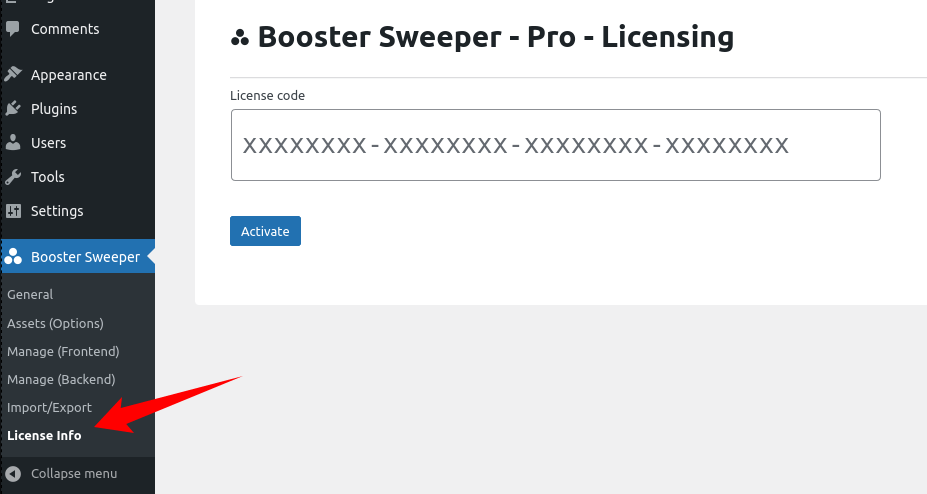
To activate the license for your Booster Sweeper Pro plugin, select the “License Info” menu item from the Booster Sweeper sidebar menu.
Settings – General
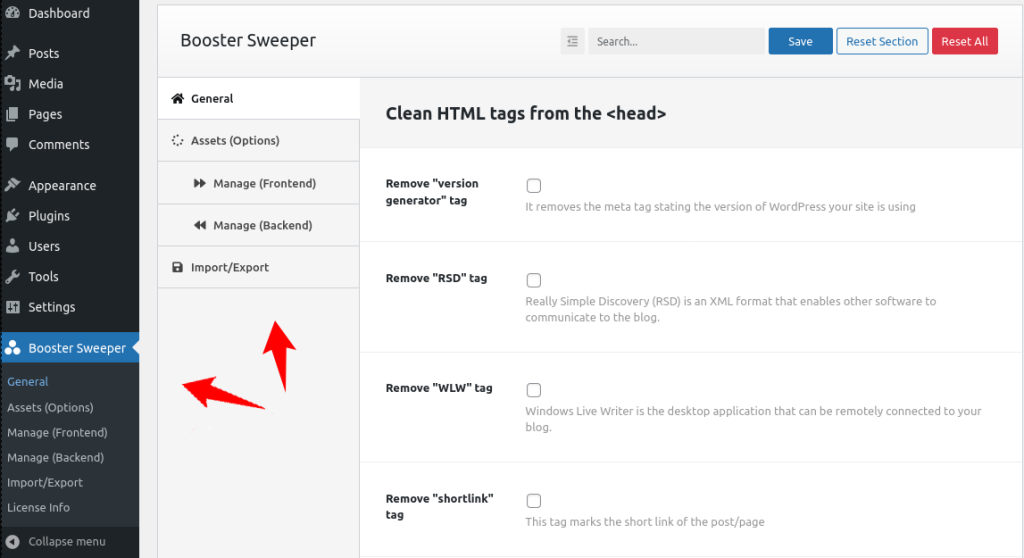
With general options, you can remove some common HTML tags that WordPress is adding which may be surplus for your site. These options are pretty much self-explanatory though each has a description provided.
Settings – Assets (options)
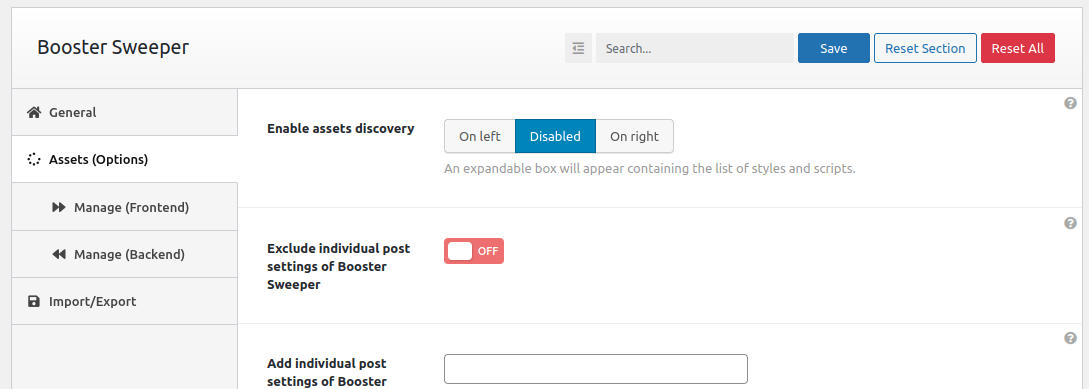
These options will allow you to set how you discover resources on your site.
Available options:
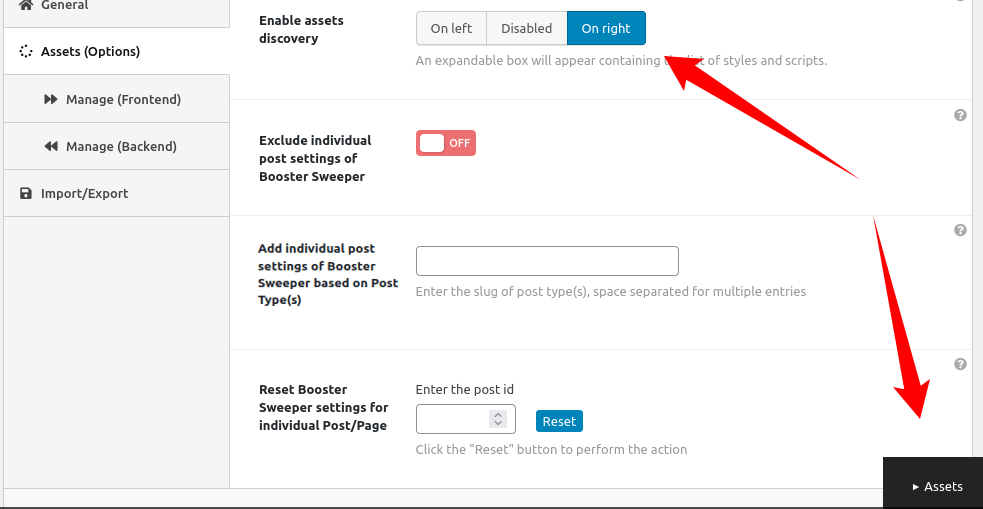
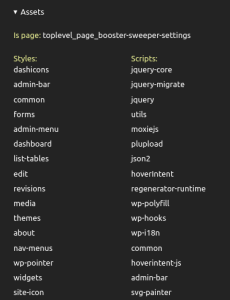
- Enable assets discovery – You’ll be able to see which styles and scripts are loading on each page. A small box will be available on each page that can be expanded and it will list all the used scripts and styles
- Exclude individual post settings of Booster Sweeper – While editing each post/page, you have the “Booster Sweeper” meta-box which provides options to dequeue the assets for that page. Though it may be convenient to have Booster Sweeper options on each post/page, it can be better organized if everything is handled from the global settings. For this reason, you may want to disable Booster Sweeper per post meta-box
- Exclude individual post settings of Booster Sweeper based on Post Type(s) – If the above option isn’t turned on, you can exclude individual settings of Booster Sweeper per post type, e.g. post/page or 3rd party added e.g. product/review/testimonials etc. This may be useful because sometimes post-type posts aren’t accessible on the front-end, i.e. providing settings only on the back-end of the site which may make the Booster Sweeper per post options redundant
- Reset Booster Sweeper settings for individual Post/Page – From the Booster Sweeper settings on the individual page/post, sometimes you may unload the wrong script/style and get your admin page messed up completely. With this option, you can reset the Booster Sweeper settings of each individual page.
Settings – Manage assets
You have two tabs for managing assets over your site. One is for the front-end side, while other is for the back-end of the site.

Available options:
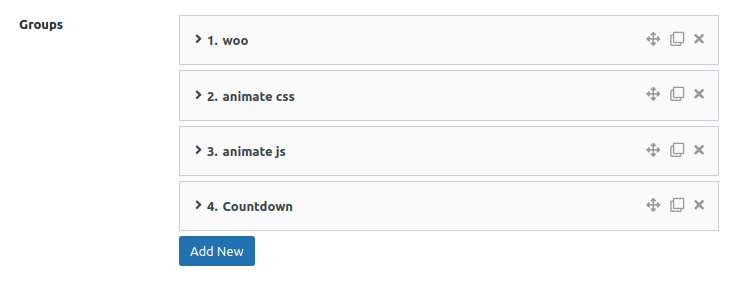
– Groups:
- Add new – add assets to the group and set where to unload/load them
– Each group options:
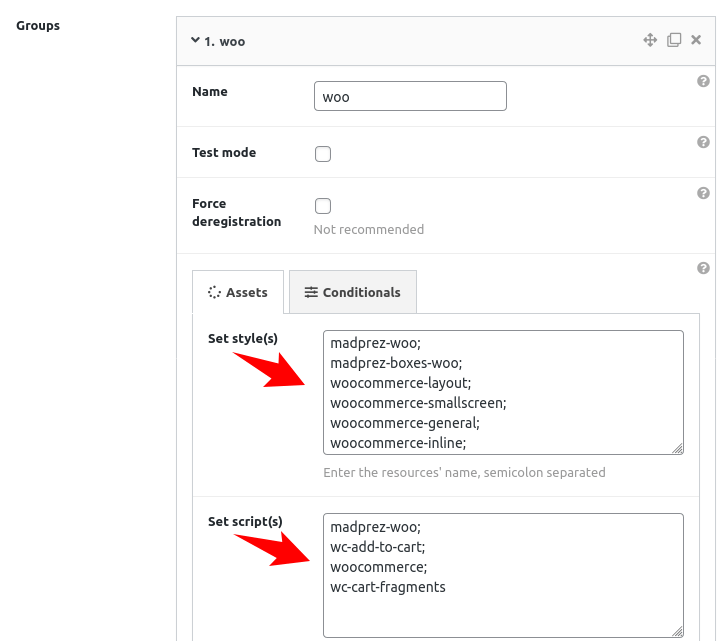
- Name – Give a name for the group
- Test mode – Only users with administrator roles will see the made changes. Concrete, saved options will affect just the users that are logged in and actually can manage options, e.g. the site Administrators
- Force de-registration – This isn’t recommended, still you may use it on some occasions. In essence, it will also dequeue resources that the script is dependent on. if some style/script is dependent on another asset, even though you select it for dequeuing, it will still be loading if another asset is invoking it. For example, often some scripts require jQuery. With this forced de-registration, the required script will also be dequeued. However, this isn’t recommended, it’s much better to list both resources for dequeuing than to force the one which will cause the other to be unloaded as well.
- Assets tab:
- Set style(s) – Enter the handle, i.e. the name of the stylesheet(s) you wish to be affected
- Set script(s) – Enter the handle, i.e. the name of the script(s) you wish to be affected
Conditionals (Frontend)
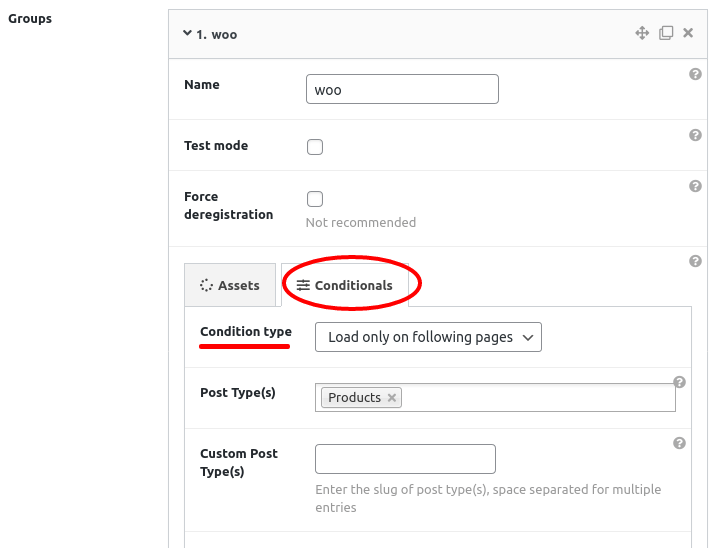
- Conditionals Tab:
- Condition type
- None – The selected assets will be removed over the whole front end side of the site
- Load only on following pages – The targeted assets will be loading on the selected pages
- Exclude on following pages – The targeted assets will be prevented from loading on the selected pages
- Note: If one of the options from the “Condition type” other than “None” is selected, you can target specific pages by selecting from the following:
- Post types, Custom post types, Specific post(s), page(s), Product(s) if WooCommerce is installed on the site, target by string in a URL’s path (RegEx).
- Further, target all archives or particular category, tag(s), date(s) archive.
- Similarly, set all WooCommerce archives or specific product category or tag(s).
- At last, target custom post type(s) archives – i.e. archives of the post types added by 3rd party plugins (if you have such on the site)
- Condition type
Conditionals (Backend)
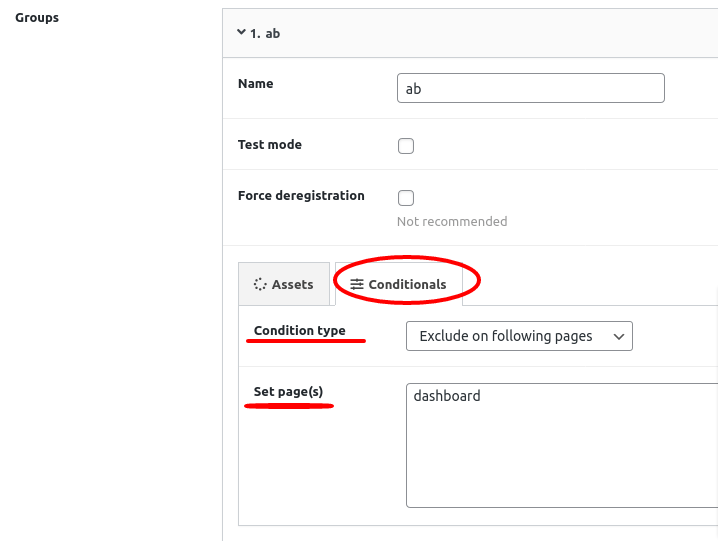
- Conditionals Tab:
- Condition type
- None – The selected assets will be removed over the whole back end side of the site
- Load only on following pages – The targeted assets will be loading on the specified pages
- Exclude on following pages – The targeted assets will be prevented from loading on the specified pages
- Note: If one of the options from the “Condition type” other than “None” is selected, you target specific admin pages by stating its names. Tip: use Assets discovery option to get the admin page’s name
- Condition type
Review all
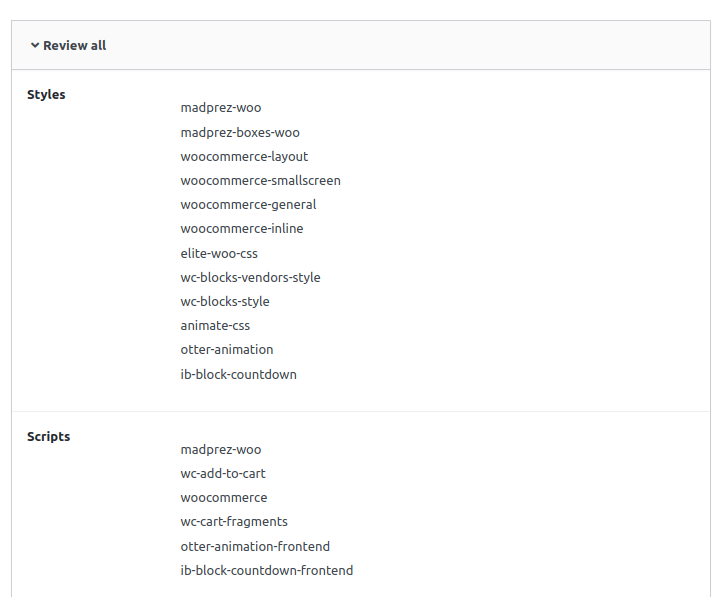
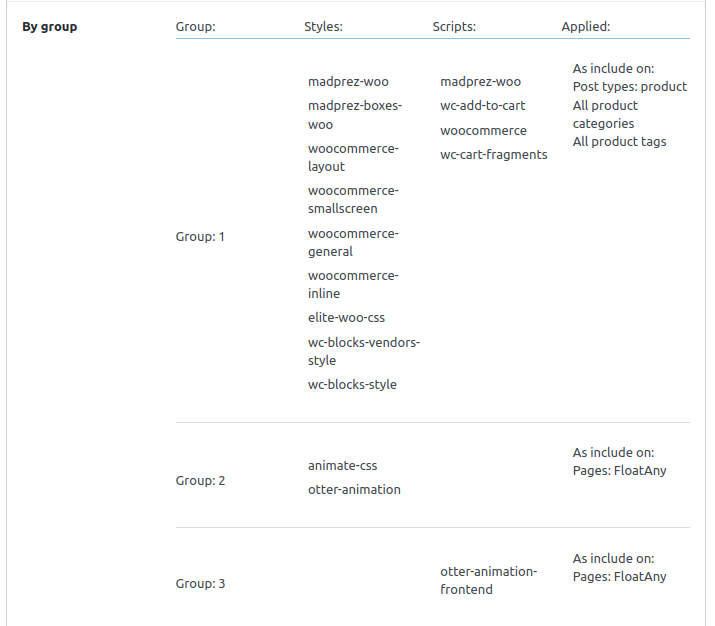
You see, you can have dozens of groups and with “Review all” you can have a neat overview of used assets.

Toggle-on this option to see:
- Which styles and scripts are used over the groups.
- By group used styles and scripts along with condition applied, i.e. which pages are affected by this group
Settings – Import/Export
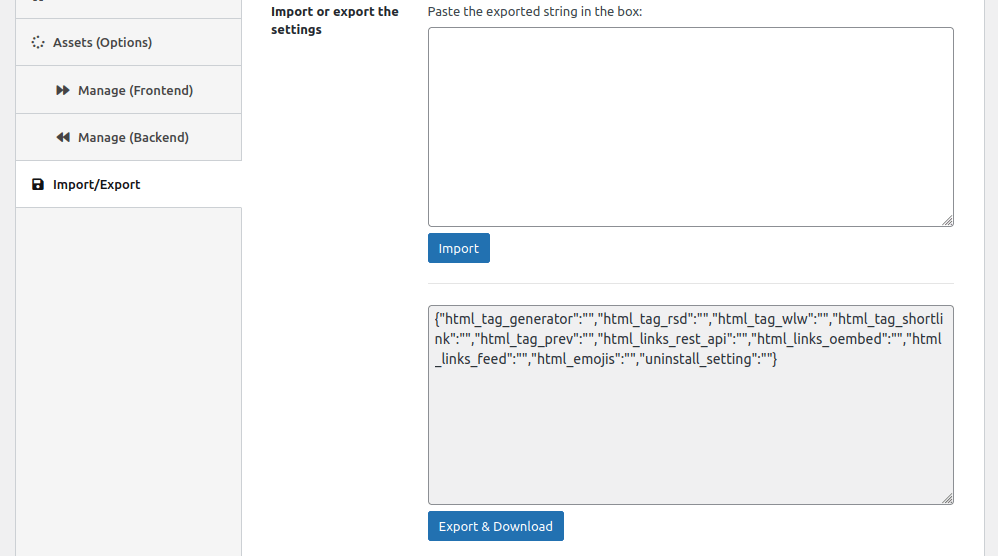
Here you can download the settings. Or you can import those settings by pasting the string from the downloaded file.
